LED aPI


This module aims to provide a simple way to manage a couple of colored LEDs through a Raspberry Pi’s GPIO and a REST API.
Note: This setup is mainly for fun usage.
Installation proccess
Download sources, unzip, goes to sources-folder.
Configuration
Prepare configuration files in your home dir:
mkdir -p ~/.led-api
cp ./logging.json ~/.led-api/
cp ./led_config.json ~/.led-api/
The content of the led_config.json must be customized
depending on the GPIO PIN setup you want to use.
For example:
{
  "white": 4,
  "blue": 17,
  "green": 27,
  "yellow": 22,
  "red": 5
}
You can use the pinout command of gpiozero (as explained here
raspberrypi.org) to get the current GPIO PIN numbers:
sudo pip install gpiozero
pinout
Or the useful pinout.xyz web site.
Usage
LED API
The LED API use the flask/flask_restplus module to provide
API and Swagger documentation.
To run the developpement server:
led-api
Join the http://<your_IP_address>:5000 URL to get the swagger
interface:
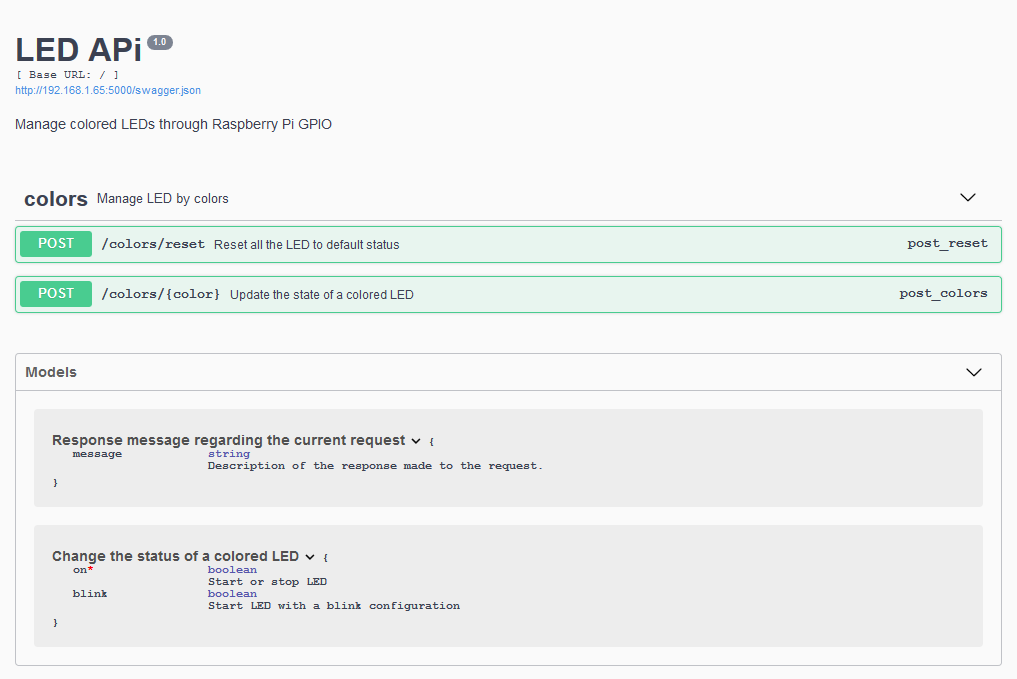
Swagger UI
You can now use this Swagger interface or your favorite REST tool to change power status of some LED:
# Example with curl to start blink on the red LED
curl "http://192.168.1.65:5000/colors/red" \
     -X POST \
     -H "accept: application/json" \
     -H "Content-Type: application/json" \
     -d "{  \"on\": true,  \"blink\": true}"
Documentation: